Storage with Cloudflare Domains & R2
Published
What’s Cloudflare R2? If you’ve familiar with Amazon S3, Cloudflare sells their R2 service as comparable object storage minus any egress fees. What’s an egress fee? Nothing, what’s an egress fee with you? Seriously though, for my purposes, their pricing calculator says it’s $0.00, and I enjoy using other Cloudflare products, so that’s why I picked R2 instead of something else.
If you want to buy a new domain and set up an R2 bucket for hosting web files, here are the steps to make that happen:
Sound reasonable? Let’s get into it.
Buy a domain
The first step is to purchase a domain on Cloudflare. You can buy domains anywhere, but having your domain and storage in one place makes for less hassle setting them up together. Cloudflare sells new domains at cost, making it tough to find a cheaper option unless a competing registrar is selling domains at some introductory rate.
Here’s how to purchase a domain on Cloudflare:
- Visit your Cloudflare dashboard (create an account first if needed)
- In the sidebar menu, choose Domain Registration > Register Domains
- Search for the domain name you want and follow the Purchase link to complete checkout
With your new domain acquired, it’s time to move on to the next step.
Create a bucket
To host files from your new domain, you’ll need to create an empty R2 bucket to store them. Here’s how to do that:
- In the sidebar menu, choose R2 > Overview
- Click the Create bucket button
- Enter a bucket name and click Create bucket again to submit
You should be greeted with the page for your new R2 bucket.
Connect to your domain
On the new R2 bucket’s page, complete the following steps:
- Click the Settings tab
- Click the Connect Domain button
- Write the domain name you intend to use, without
httpsor any slashes - Click the Connect domain button
- Give it a minute and refresh the page to confirm that Status is
Active
When the status switches over, you’re ready to set up CORS for your new R2 bucket.
Configure CORS
Cross-origin resource sharing: the wrench in the works of any new integration and a frequent “what went wrong” topic in sprint retrospectives. It takes a few steps to set up the right CORS config. When I set up a public R2 bucket for myself, configuring CORS took longer than all the other steps put together. Luckily, it’s a pretty straightforward process if you know what to do.
Here are the steps to set your CORS policy:
- In the sidebar navigation, choose R2 > Overview
- Find your bucket in the Buckets table and follow its link
- Click the Settings tab
- Follow the link to Edit CORS policy
- Submit the following JSON. Cloudflare recommends this code in their official documentation:
[ { "AllowedOrigins": [ "http://localhost:3000" ], "AllowedMethods": [ "GET" ] }]The last CORS-related step is setting the correct access-control-allow-origin=* header. This permits browsers to use the cross-origin resources they request:
- In the sidebar menu, click Websites
- Follow the link to your domain name
- In the sidebar menu again, click Rules > Transform Rules
- Click the Modify Response Header tab
- Click Create rule
You should now be on a page with a form to create a new header modification rule. It took me a while to figure out this step, and thanks to Giorgio on the Cloudflare forums, I was able to finish CORS setup with this final change:
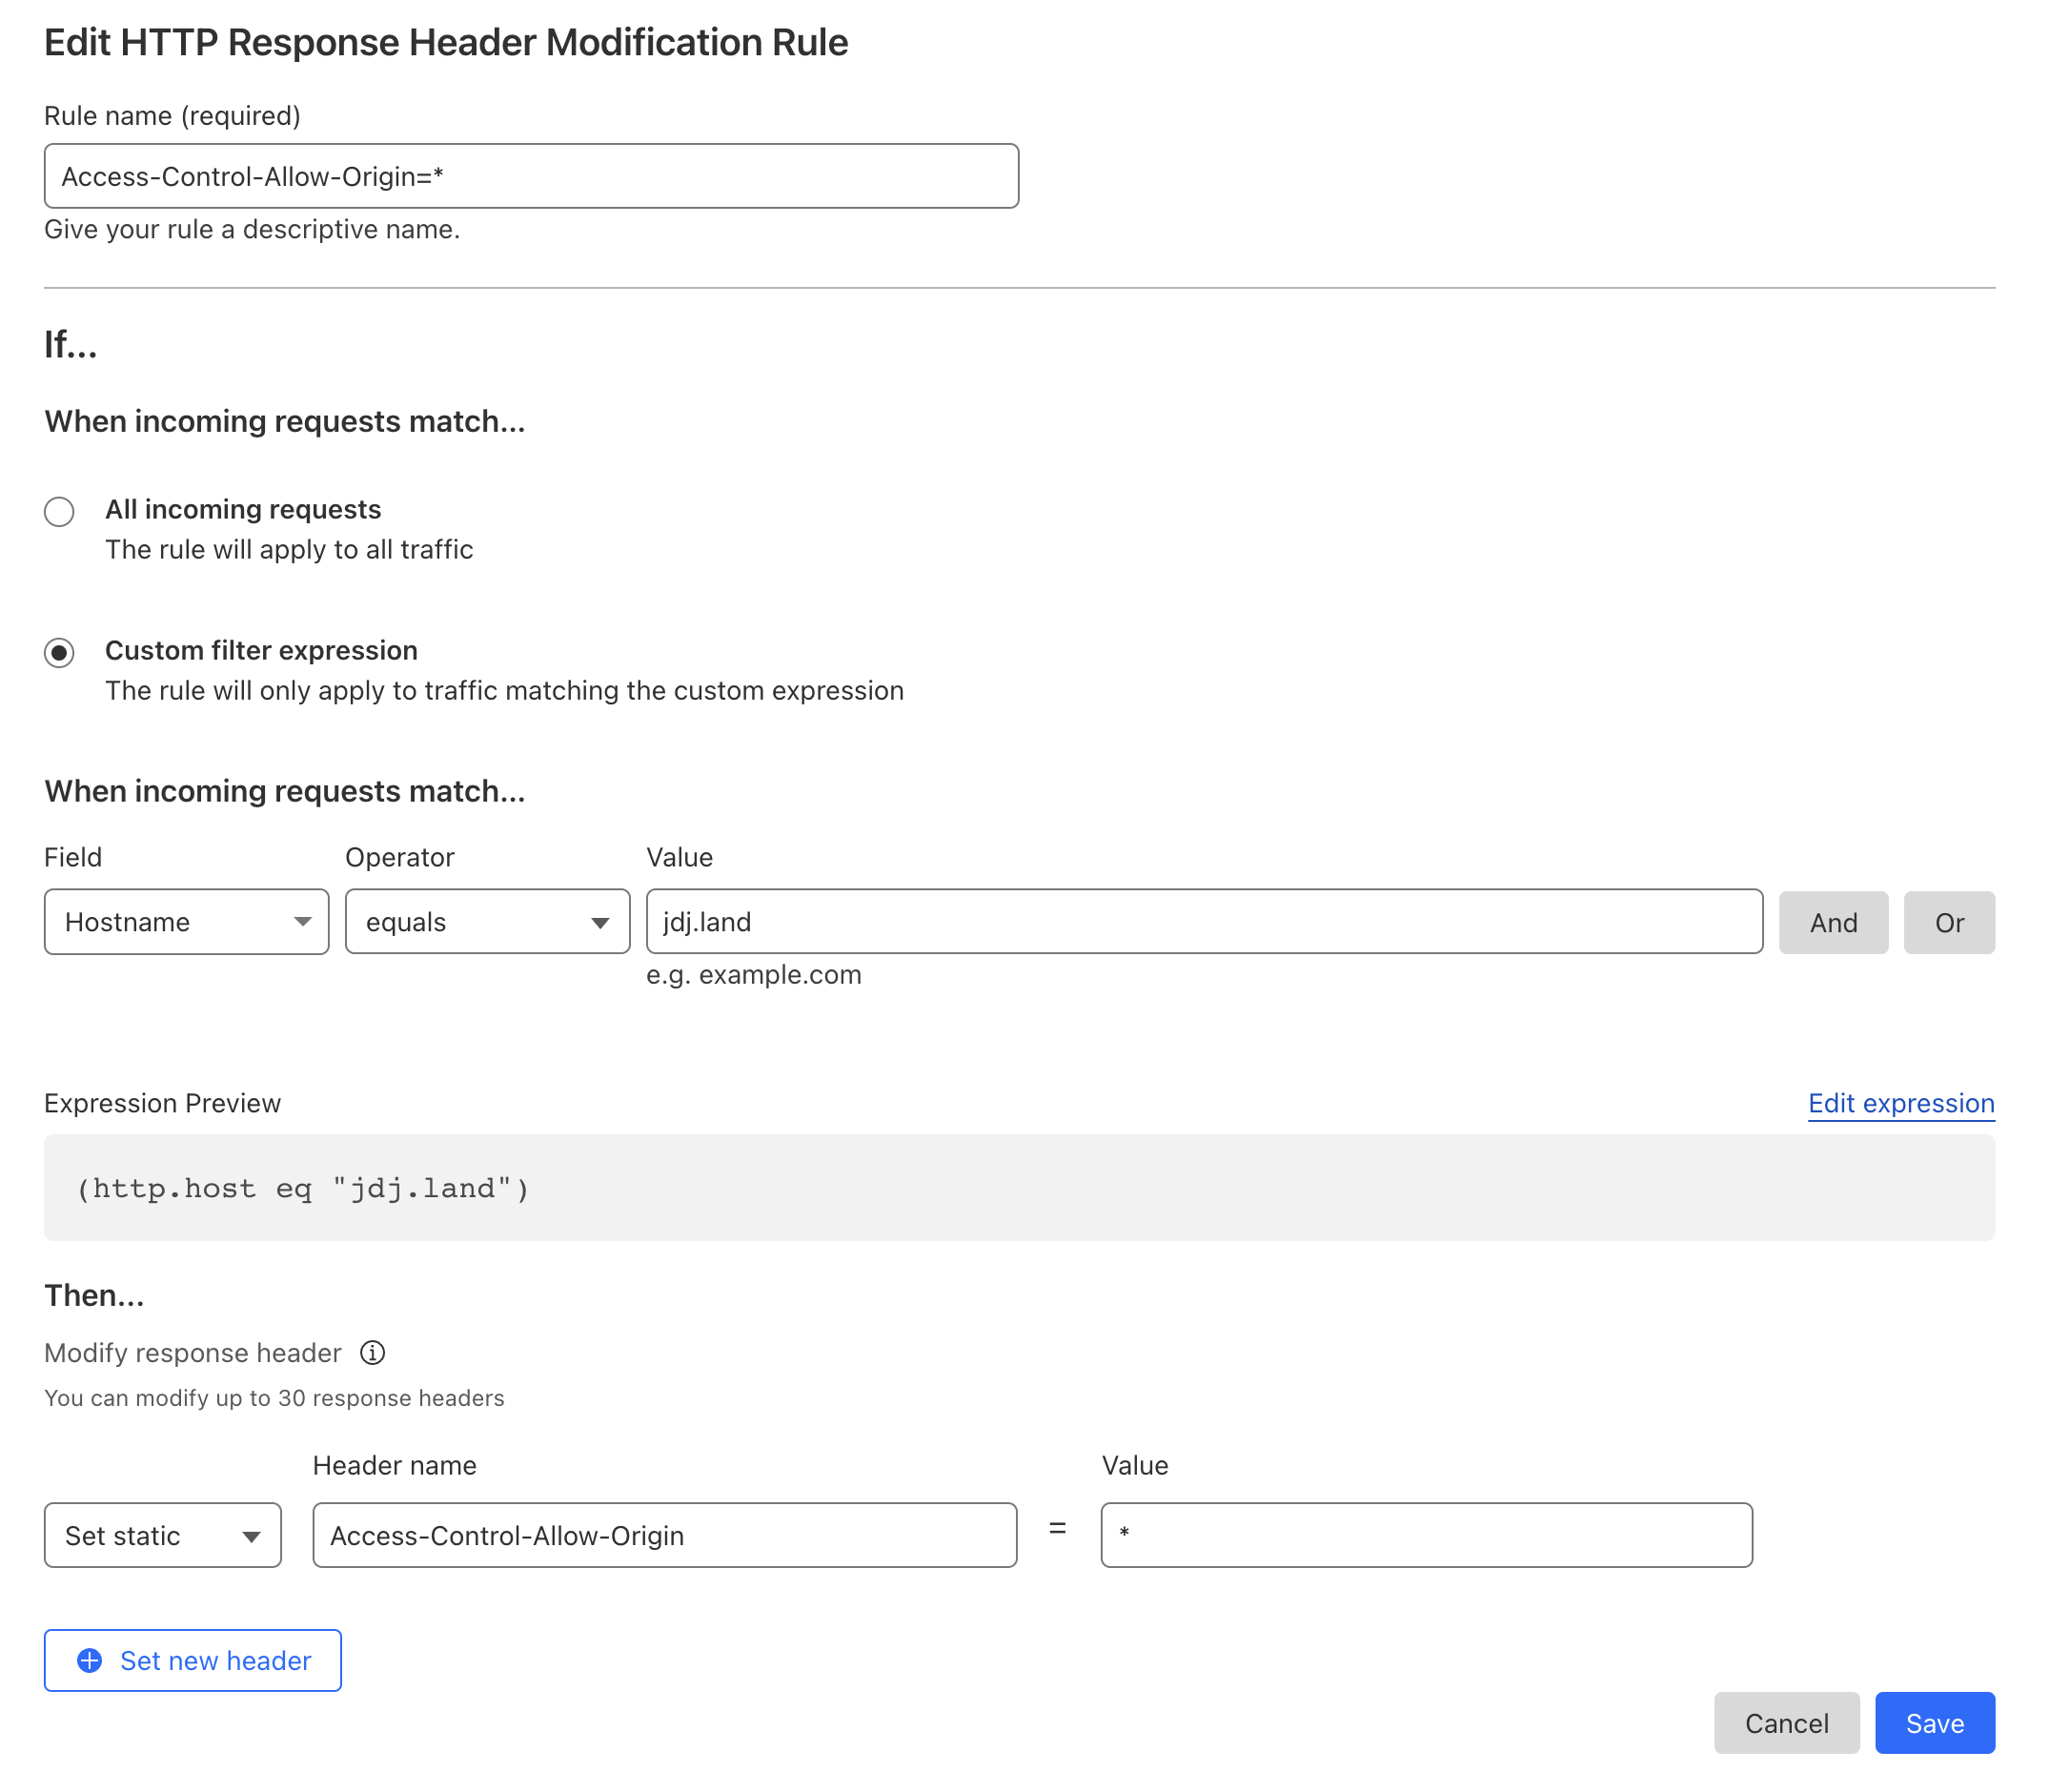
- Fill out the Rule name field. I used
Access-Control-Allow-Origin=* - Select
Custom filter expression - Fill out the When incoming request match… fields with the following 3 values: Field is
hostname, Operator isequals, and Value is the domain name - In the Then… section, set the dropdown to
Set static, the Header name field toaccess-control-allow-origin, and the Value to* - Click Deploy to ship the change
Now the only thing left is to upload some files.
Upload files
Back on the page for your new bucket, you can drag whatever files you want to host into the Objects table and they will automatically upload. There are also programmatic ways to upload files that I haven’t explored yet. Expect a follow-up post whenever I need to set up more technical R2 integration.
Files uploaded to an R2 bucket can be accessed by their public URLs. A file named image-file.jpg uploaded to an example.com bucket can be requested with the URL example.com/image.jpg. Files nested inside directories will have their folder structure maintained in the resulting URL: example.com/path/to/image.jpg
Wrap-up
Following the steps in this guide, you should now have a new domain set up to host static files from Cloudflare R2. You can upload anything to R2 and have it publicly accessible on the web. I’m using it for fonts and images on this blog, for example.
Have fun building! Feel free to reach out to me on Twitter if you run into any issues with this setup.